Lookup here …
Arduino UNO Q
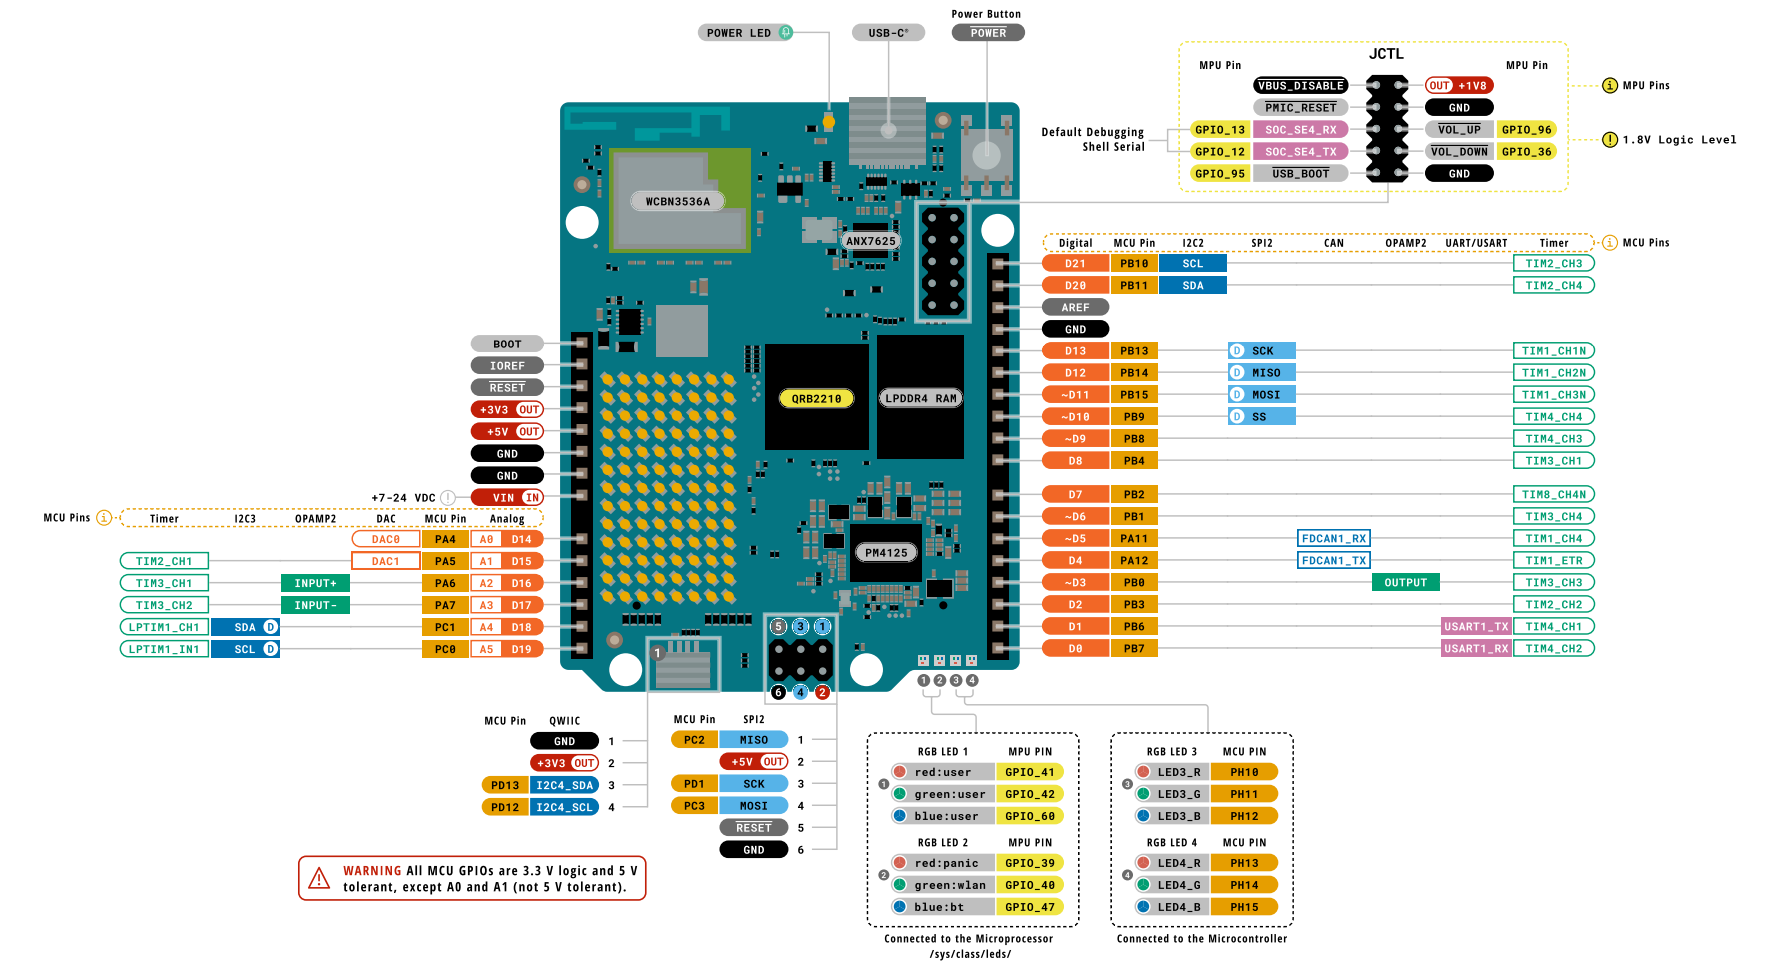
Board pinout

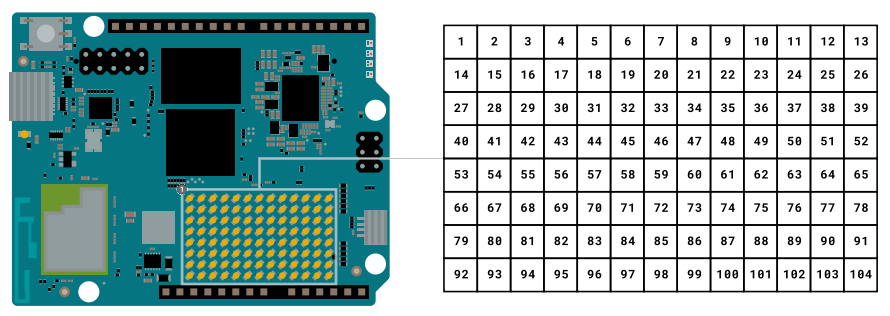
LED Matrix 8×13
Flashing a New Image
For Ubuntu
WARNING! Note that the instructions in this tutorial will wipe the board clean, and files & configurations saved on the board will be destroyed.
- Download the Arduino Flasher CLI for your OS (MacOS / Linux / Windows)
- Unzip the downloaded file, (you will receive an executable binary named
arduino-flasher-cli) - Disconnect the board from your computer.
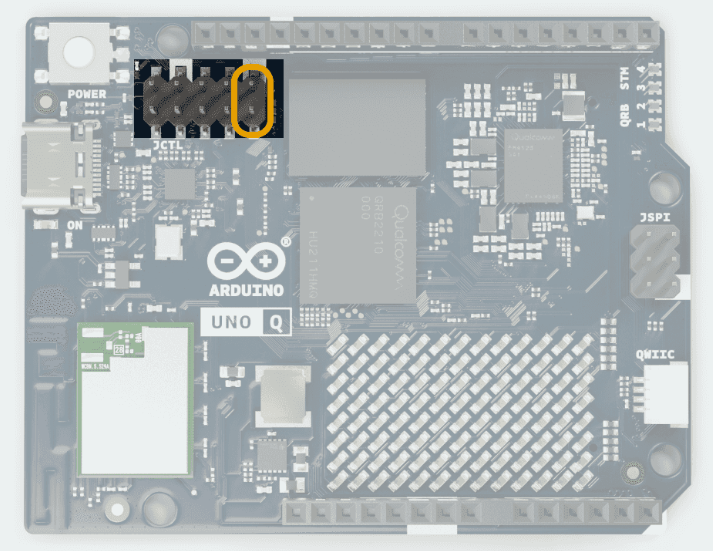
- Add the female-to-female jumper cable between the two pins specified in the image:
- Connect the board to your computer, using a USB-C® type cable.
- Open a terminal and navigate to the directory where you unzipped the Arduino Flasher CLI (normally
cd /Downloads). - Run the following command in the terminal:
./arduino-flasher-cli flash latest. - A download sequence will begin (the image is >1 GB). Once the download is complete, it will flash the board with the new image. Please note: this will take several minutes. Do not disconnect the USB cable during this process.
- Once flashing completes and the tool reports success, power-cycle the board (unplug and re-plug USB) so it boots the new OS.
Troubleshooting
- Ensure the Arduino Flasher CLI is unzipped and accessible.
- Check that the correct pins are shorted, and that they are shorted before connecting the board to the computer.
- Make sure the board has not finished booting when running the flashing command (
./arduino-flasher-cli flash latest). - Verify that you are running the command from the correct directory where the Arduino Flasher CLI was unzipped.
- After the tool reports a successful installation, power-cycle the board with the jumper removed.